View Documentation

Getting Started
To start off, this web-application's purpose is to offer a user a range of tools with which they can excersize their time-management skills
By using this tool frequently, the user's tasks are simplified to a great extent. Thus, they user can easily eliminate workplace stress and in turn, improve their productivity
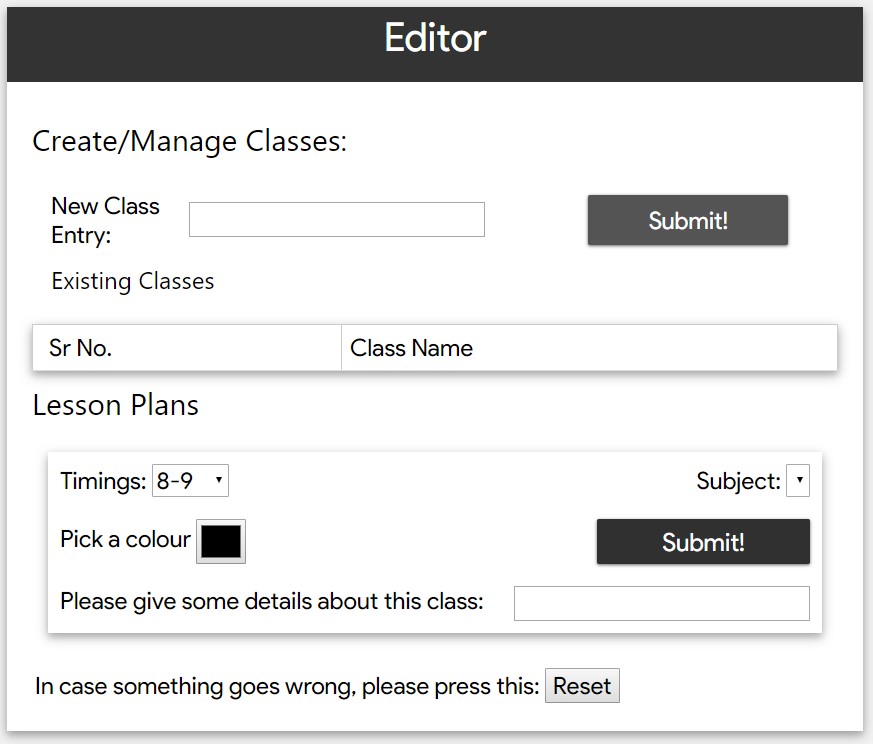
The Editor
Whn you first open the web-aplication, you will see two panes, One labelled 'Editor' while the other features a table. The Editor pane is where we will focus now.
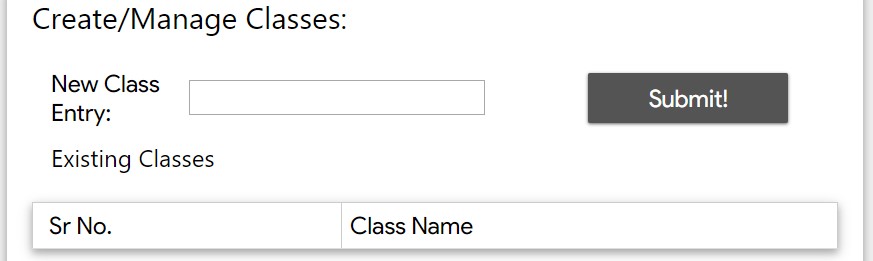
The first element we see is a Textbox. Over here, we add the name of the lesson that we must add. It then relays the information to the table below where the lessons are stored.
Moving along, we come across the 'Lesson Plans' editor. Here, you can add a custom name to your class (examples include room number or teacher names). The time of your lessons is also decided here along with the custom color feature.
Add A class
Creating a class is extremely intuituve in our web-application. To start off, type the name of your desired class in the textbox under 'New Class Entry'. Then, press the neighbouring submit button. After the class loads up in the Existing Classes table, go over to the 'Time Table' pane and press the first Button named: 'Add Plan'. The class will now appear in the first row of the table

Remove Classes
Deleting a Plan is easier that adding one! Navigate to the 'Time Table' pane and press the 'Delete Coloumn' button. Voila! the class is gone!
Customizing Plan
In today's world, where every application/website provides readymade solutions, you may feel the urge to personalize your solution. Thus, with that in mind, we added a customization feature to the web-application which allows you to change the indivual plans.
To start off, the user must pick a suitable time for their plan as well as specify the subject discipline they are applying this new plan to. This is done using the Timings and subject drop-downs.
After that, the user can edit the colour that is preffered on the indivual plan using the interactive colour wheel. Finally, the user can input a custome text to display on the plan such as a Room Number or the Requirements for the plan.
![]()
Errors
